My Journey with CI/CD in Power BI: A Personal Tale of Transformation Part 3

Daniel Patkos
In part 3, I’m going to give you a step-by-step description of the implementation process of source control in Power BI. This can be divided into 4 parts:
- Modify settings in Power BI Desktop
- Download & Install necessary softwares
- Set up environments
- Use it!
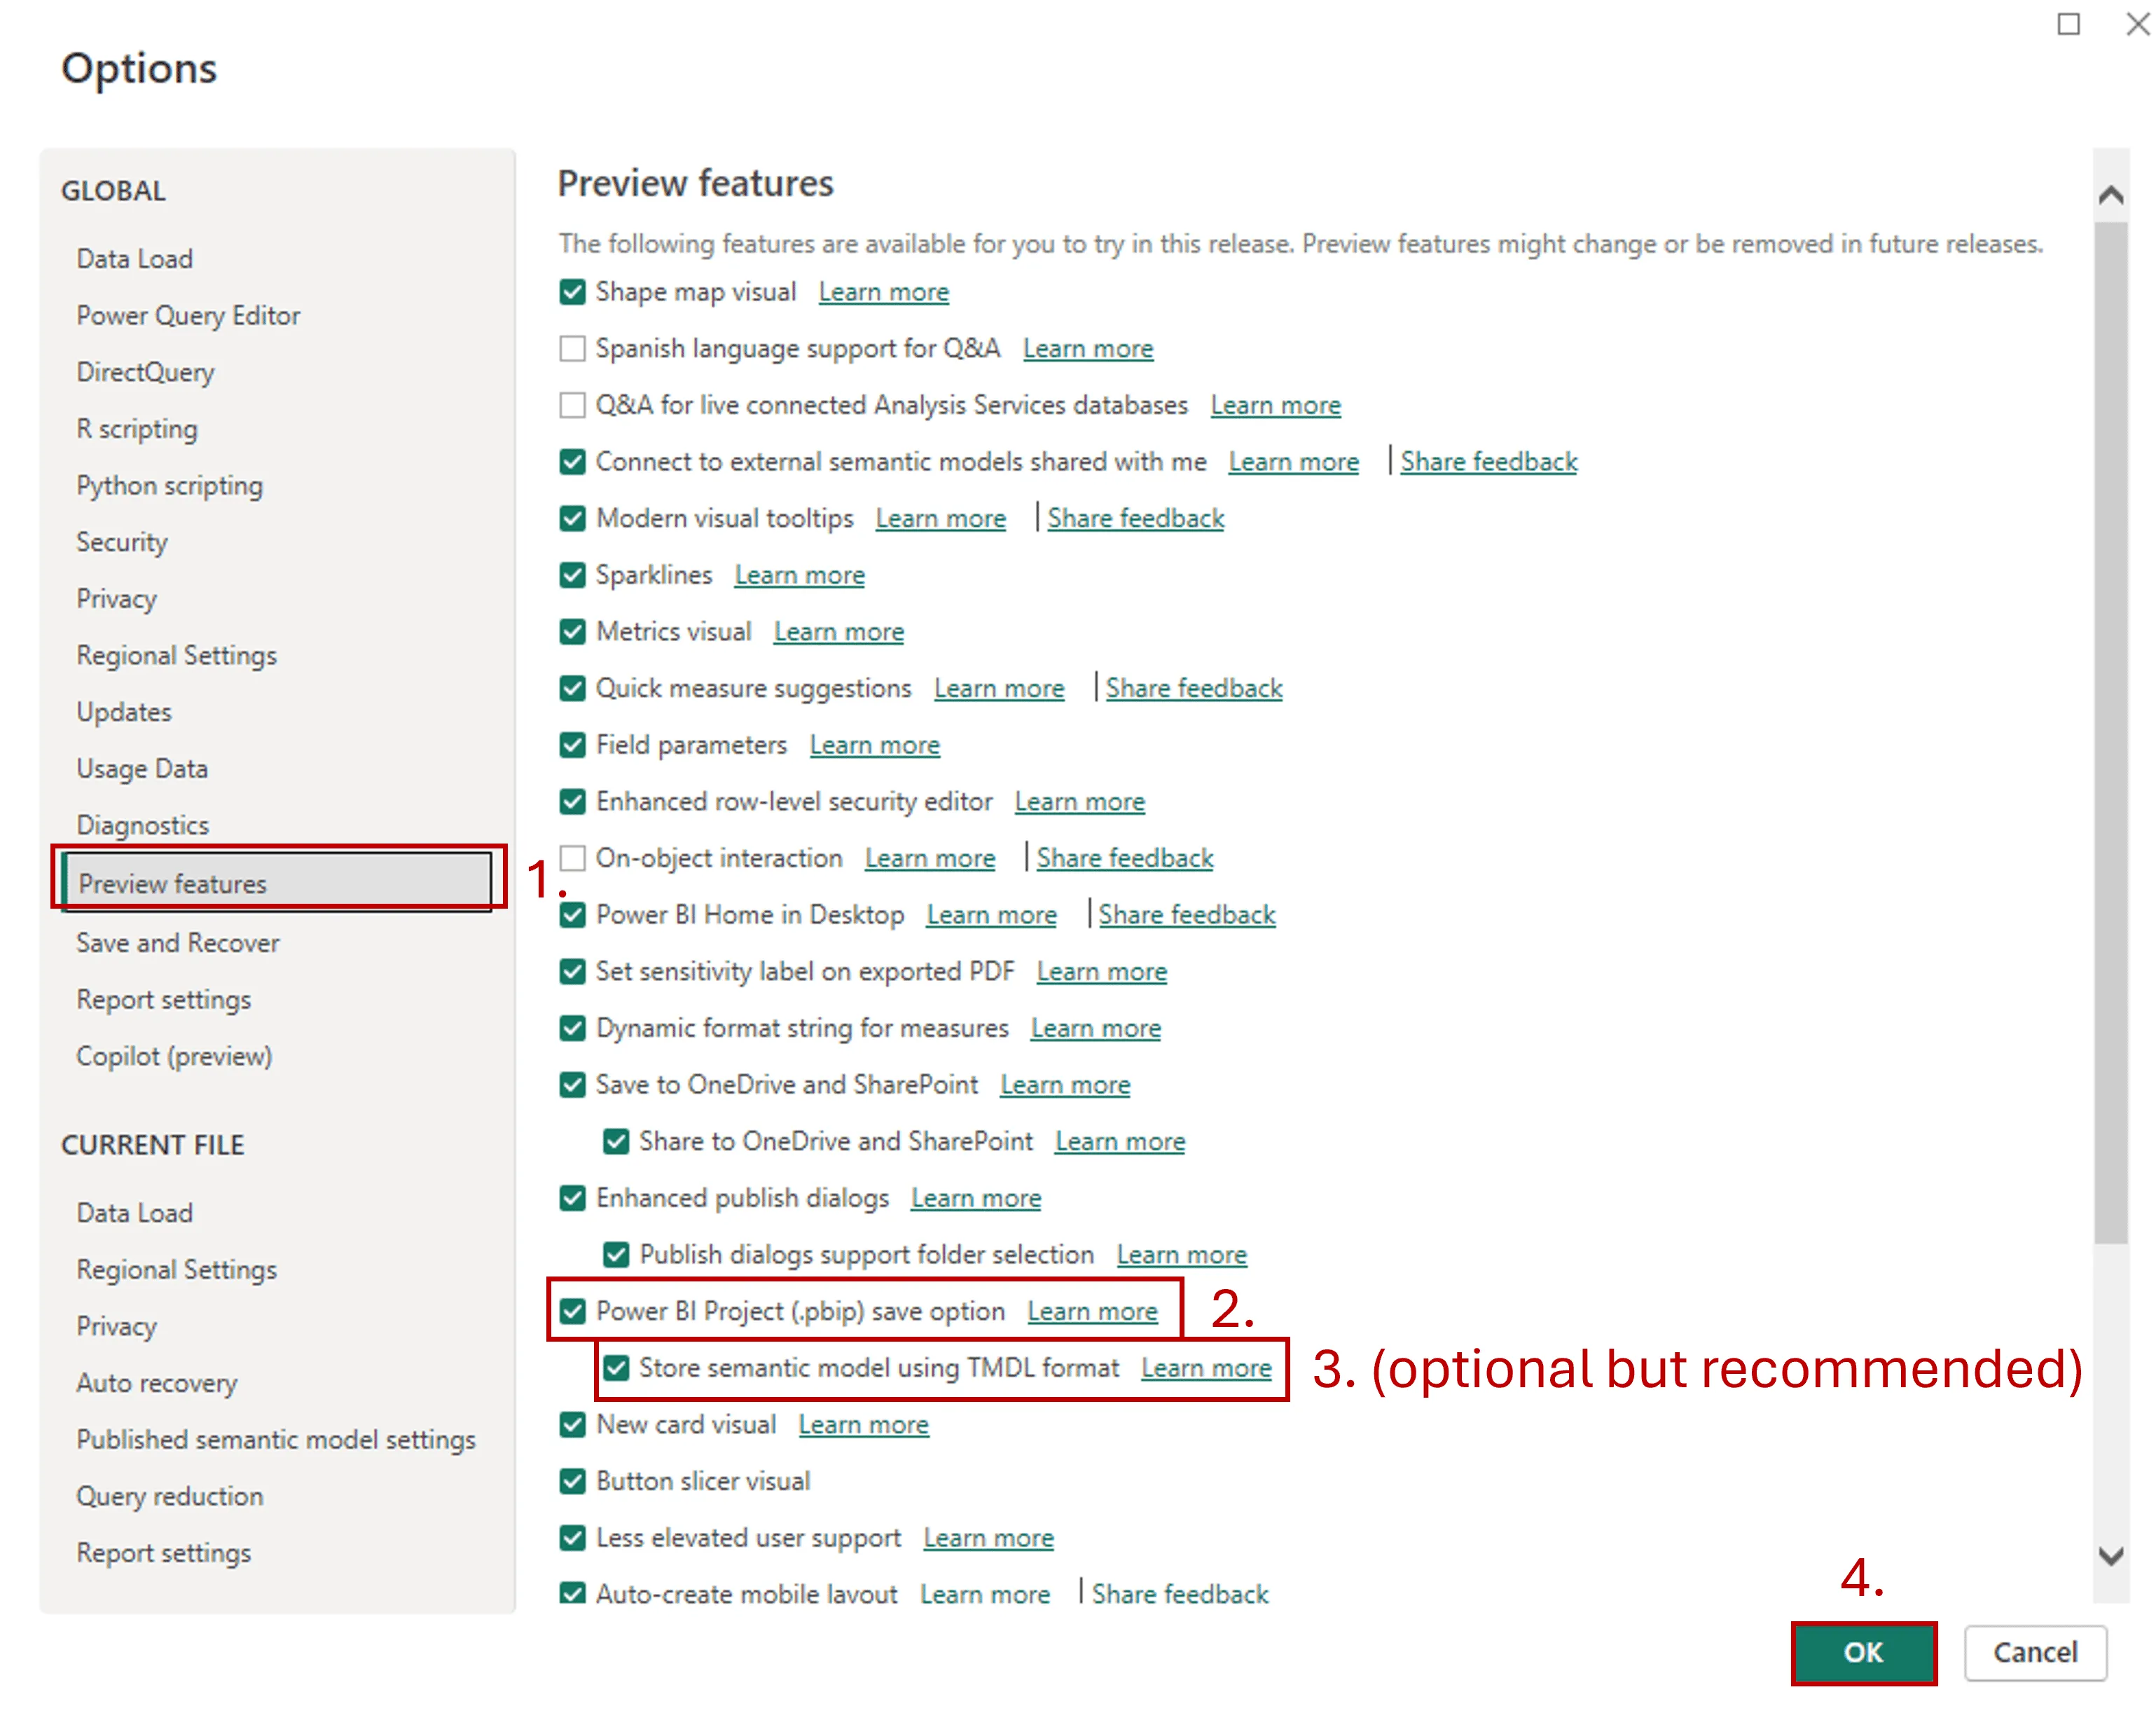
Step 1 - Modify settings in Power BI Desktop: Enable preview feature: Power BI Project (*.pbib) save option
- Open Power BI Desktop
- Go to Options and settings and select Options

3. Click on Preview features and enable Power BI Project (*.pbib) save option +1 optional) I’d recommend ticking the boksz next to Store semantic model using TMDL format 4.Hit OK
And now we can move to Step 2. Step 2 - Download & Install necessary softwares At VisualLabs we decided to use VS Code but you can do the basics in Power Shell as well. The reason I prefer VS Code is that you can have a visual interpretation of your project (track all the branches, merges, etc at the same time).
- Download and install VS Code - https://code.visualstudio.com/download
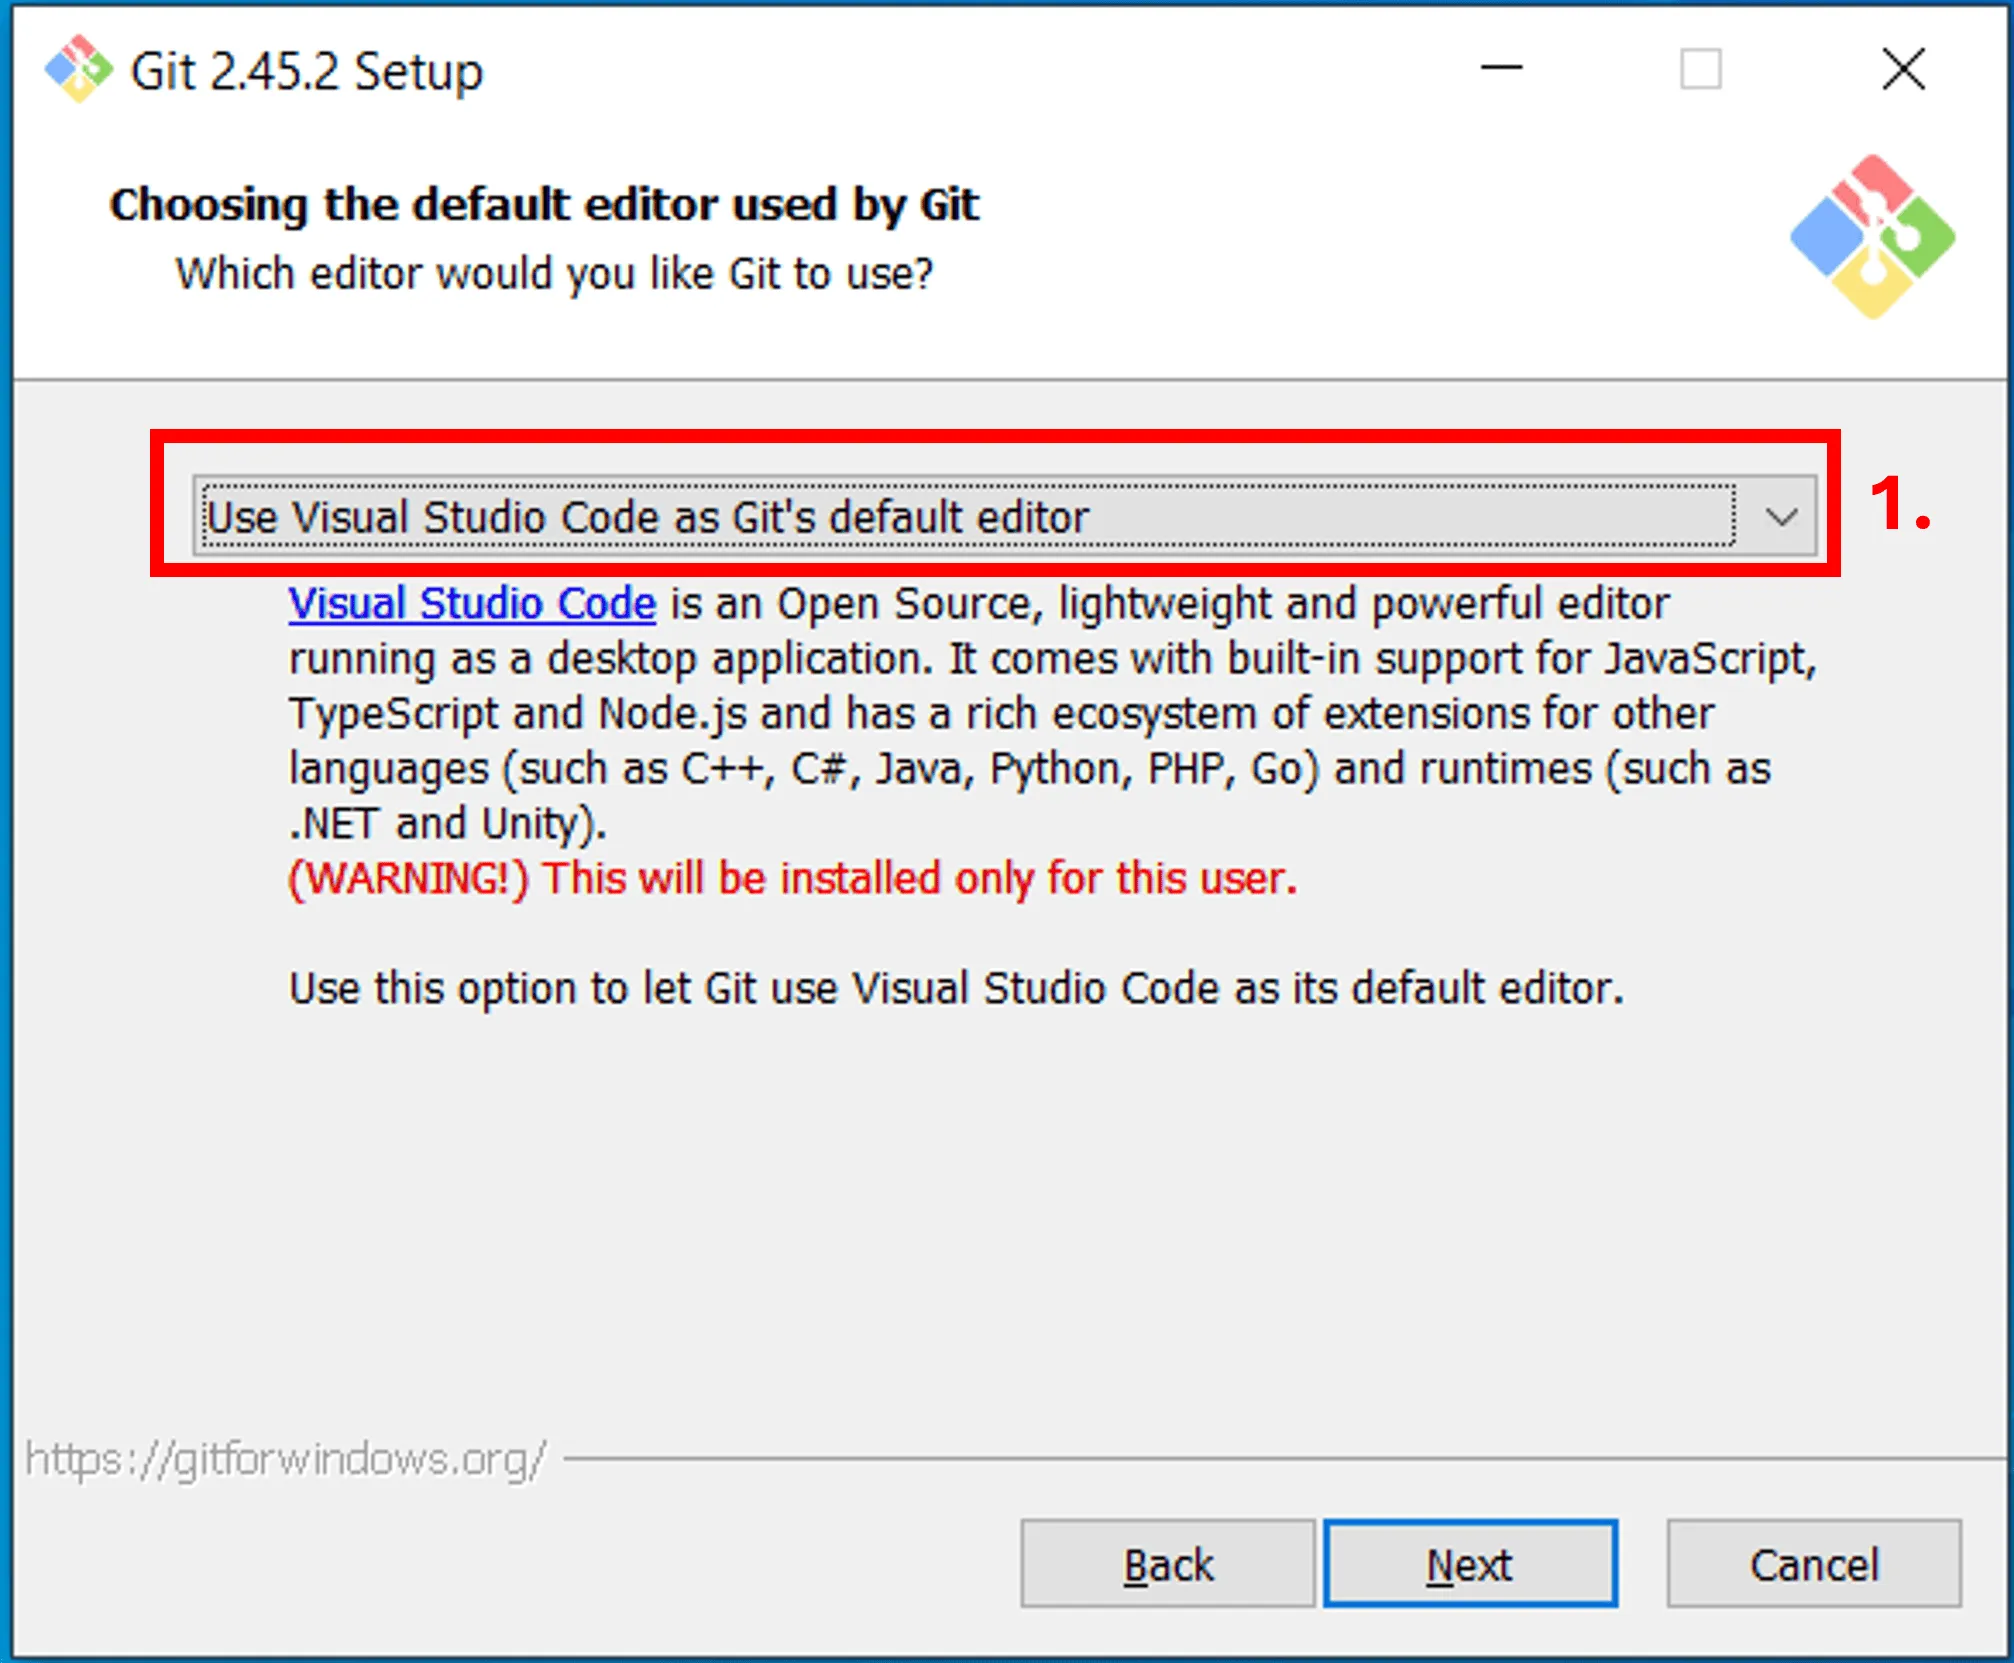
Feel free to install it with the default settings. 2. Download and install GIT. You can download it from here: https://www.git-scm.com/downloads Feel free to install it with the default settings, the only thing you can change is the default editor, which you can set to Visual Studio Code.
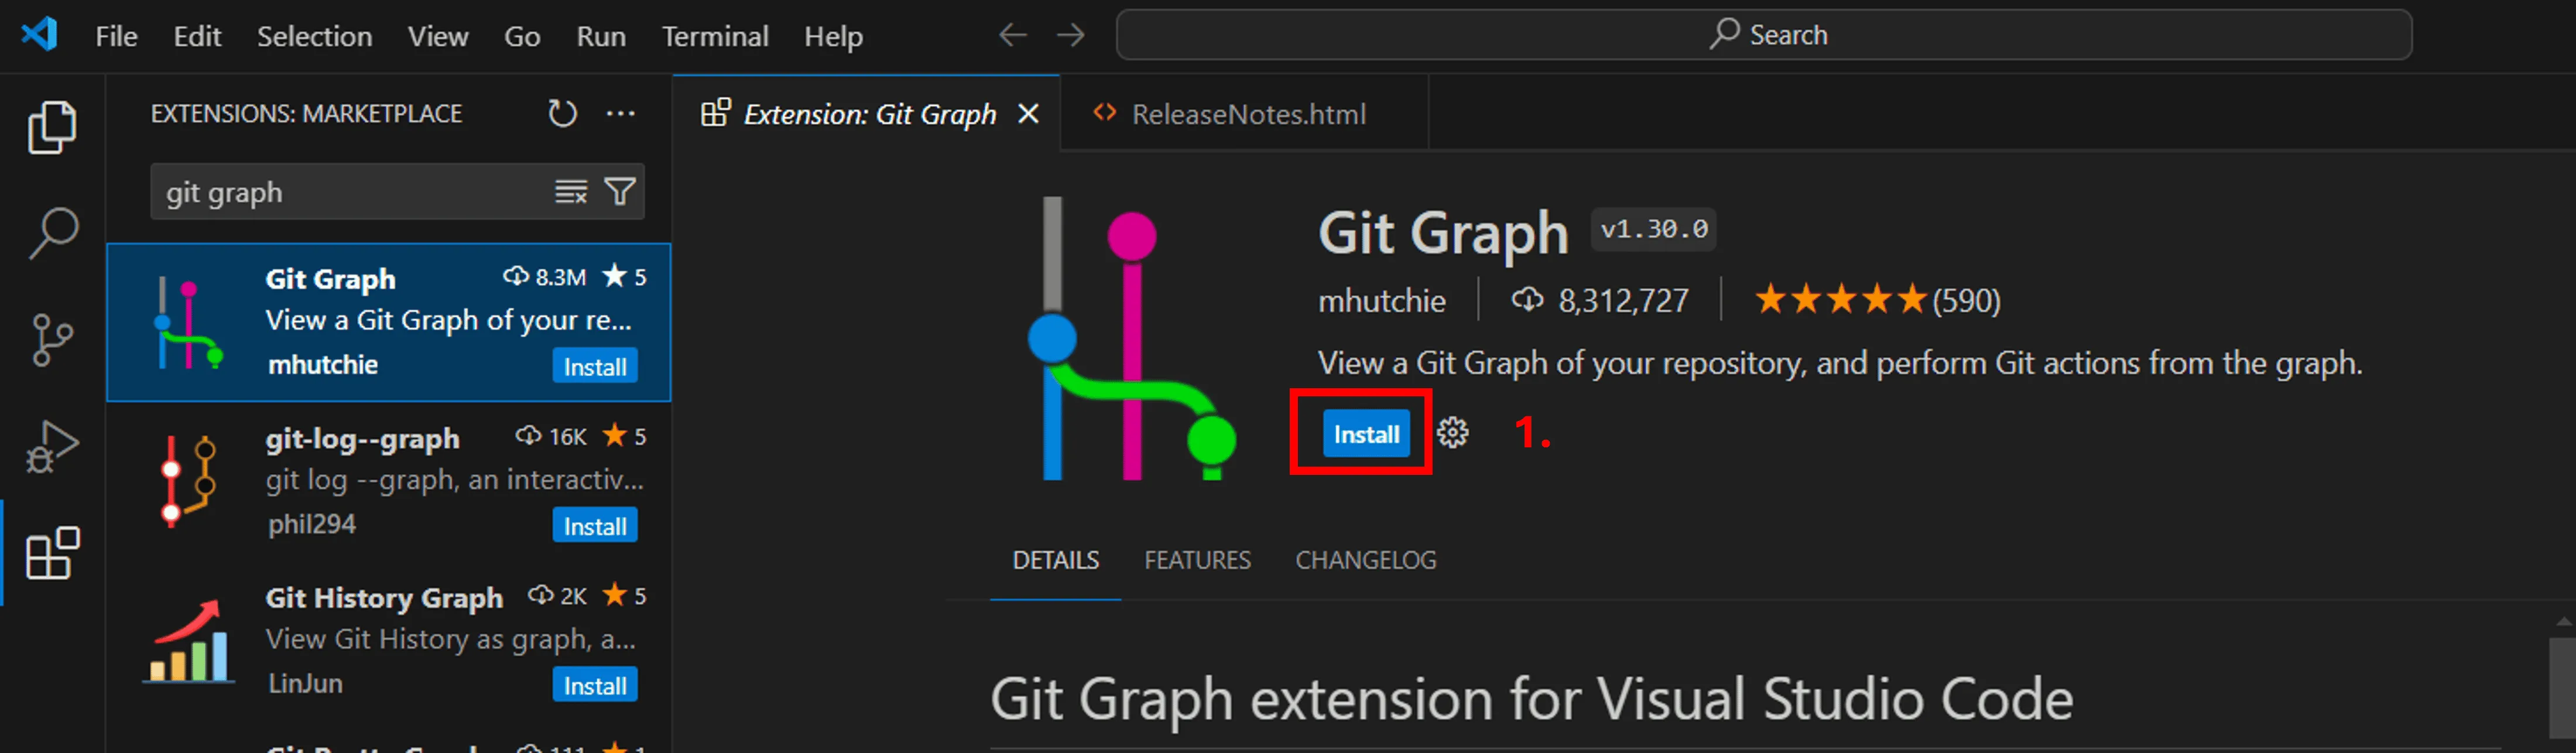
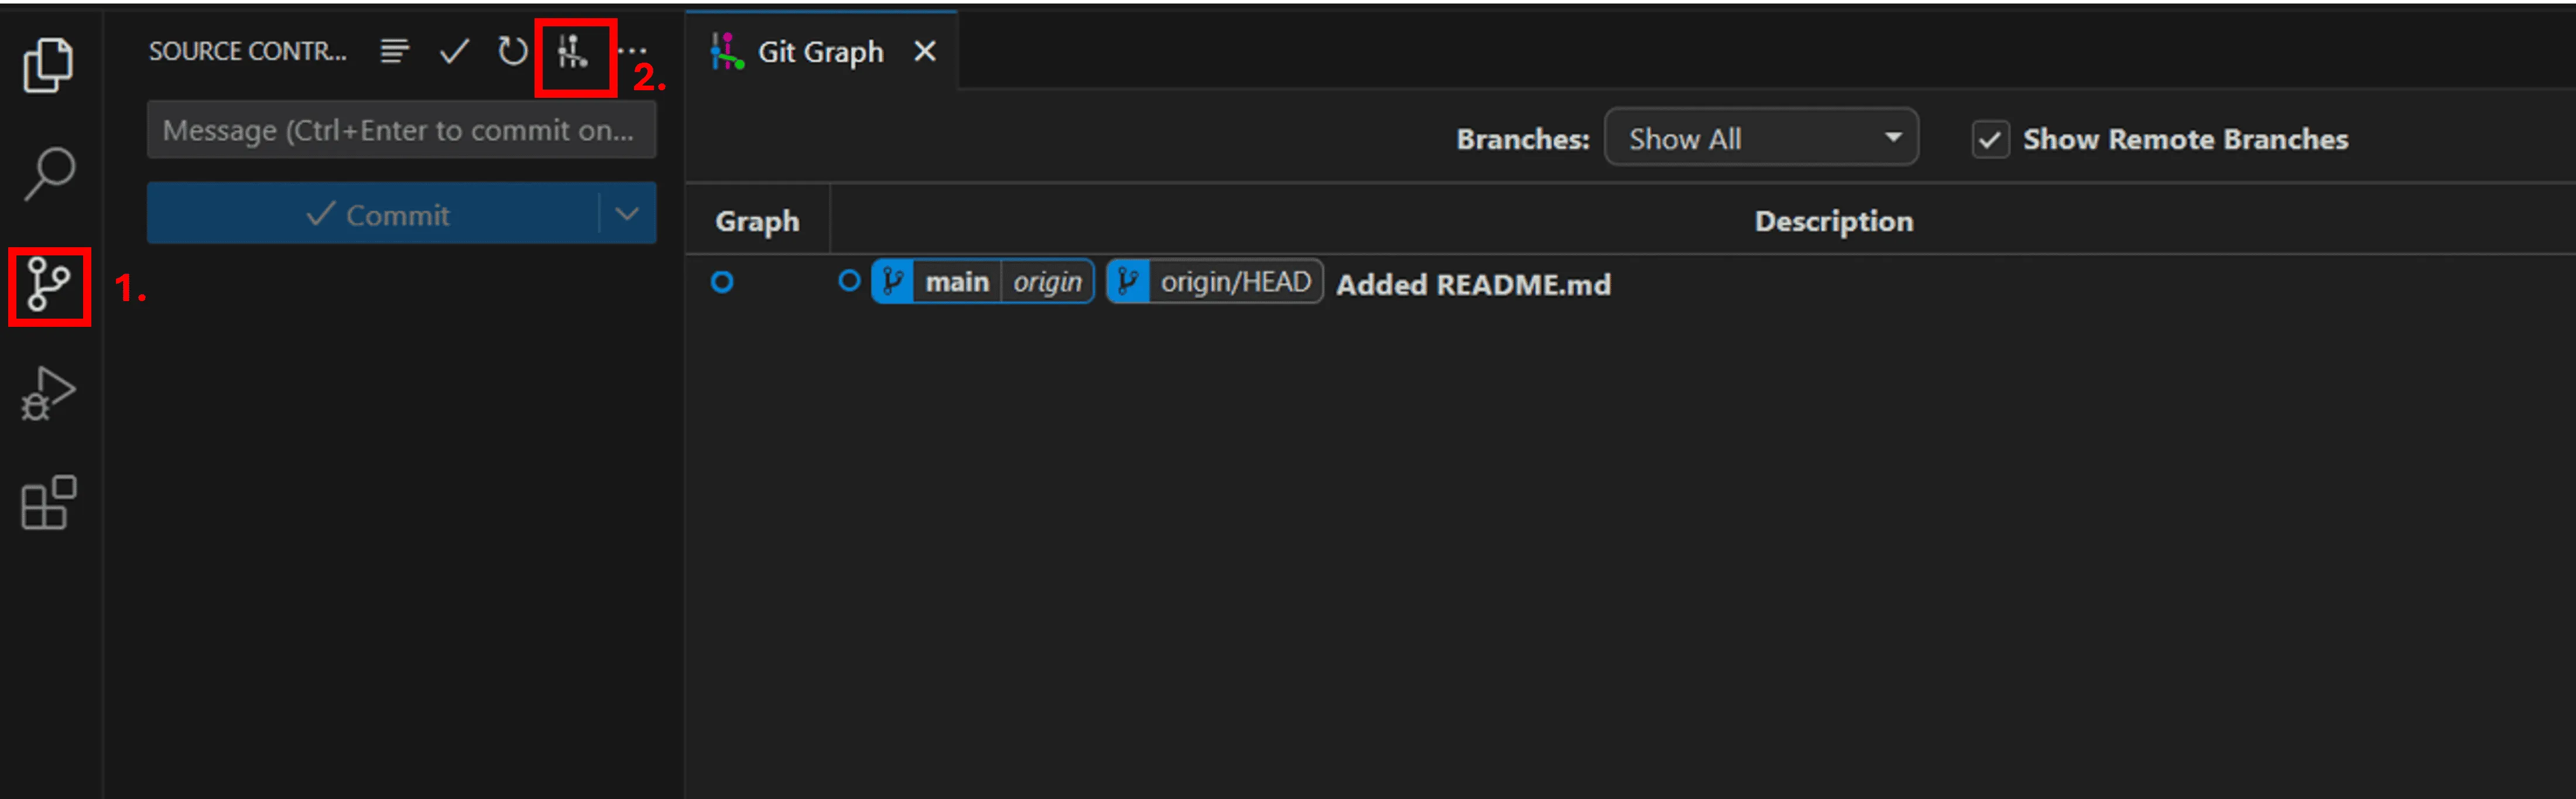
3. Add GitGraph to VS Code – this will allow you to see the historical changes of your repo as mentioned above.
- Open VS Code
- Click on Extension on the right
- Type Git graph
- Select from list
- Click Install
Step 3 – Set up GIT and Azure DevOps environments
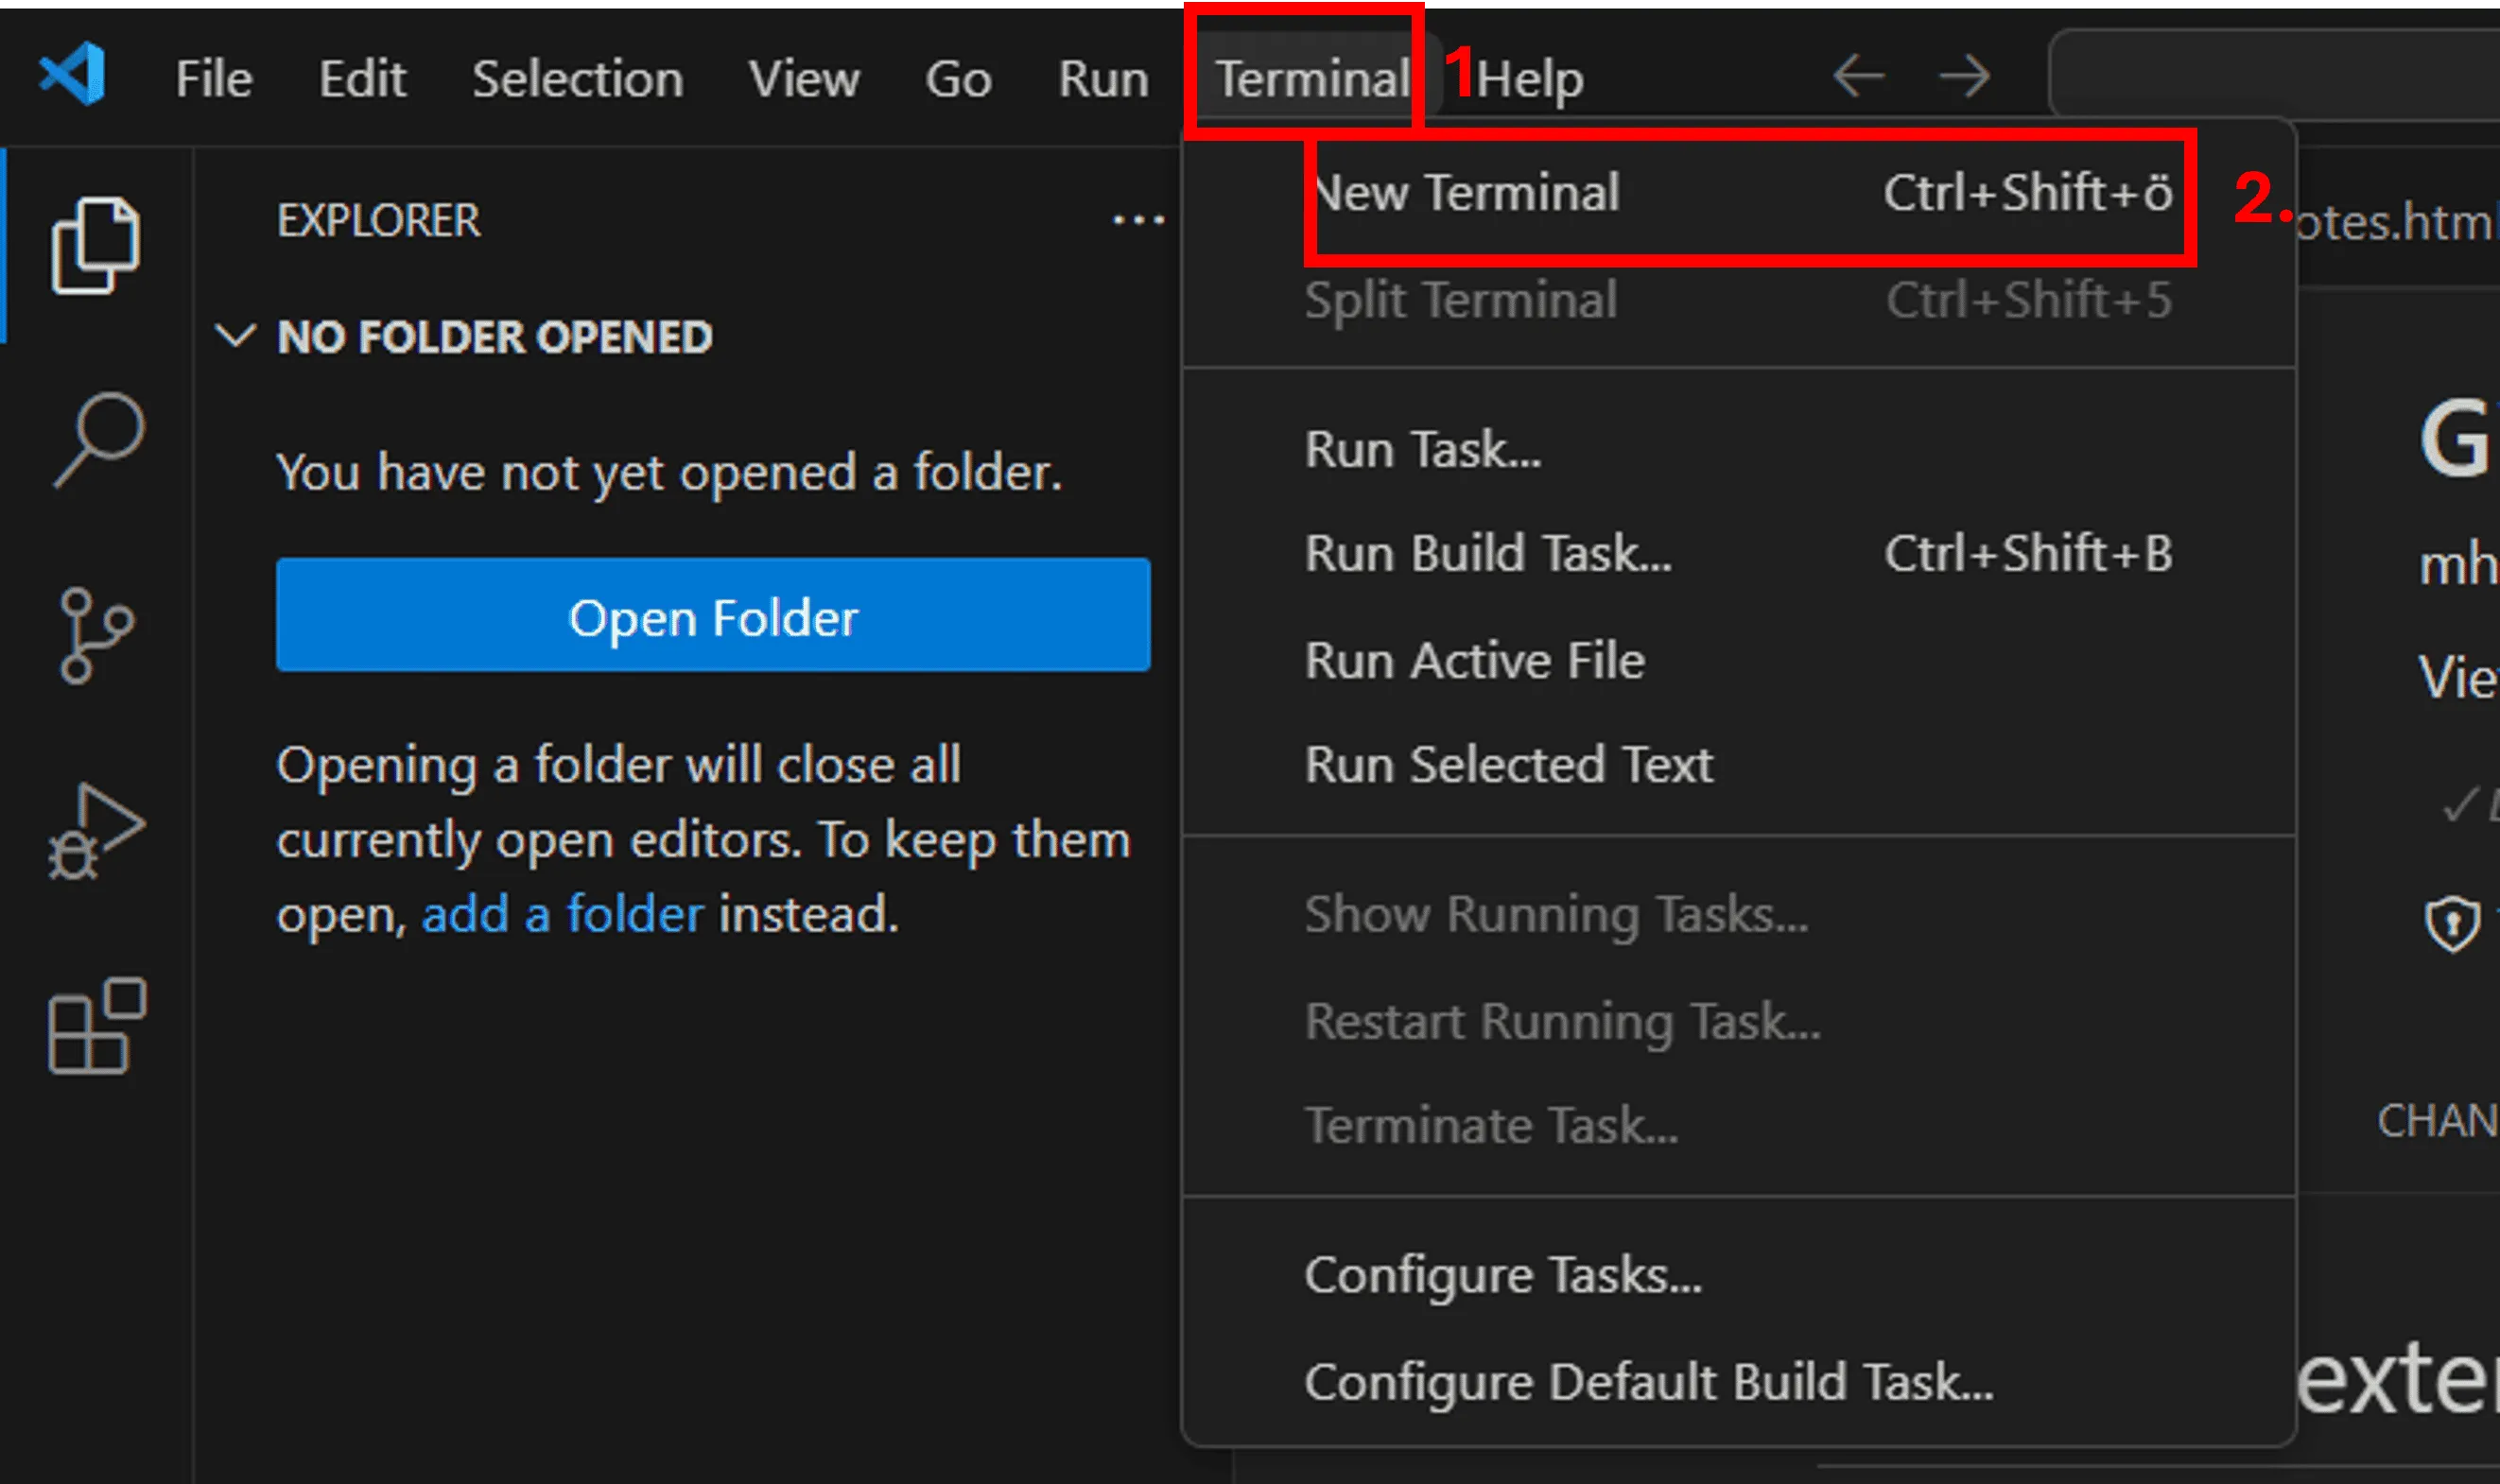
- Set up VS Code as your default GIT editor - Open a New Terminal in VS Code and type this command (you may need to restart you VS Code or machine to make the commands work properly):
git config --global core.editor "code --wait"
Set up your GIT Identity – type this command in the terminal git config --global user.name "FirstName LastName" git config --global user.email firstname.lastname@myorganization.com
Create a repo on Azure DevOps You can follow this MS documentation: https://learn.microsoft.com/en-us/azure/devops/repos/git/create-new-repo?view=azure-devops#create-a-repo-using-the-web-portal
4. Once the repo is there, you’ll see this on your screen and now you can clone it onto your computer
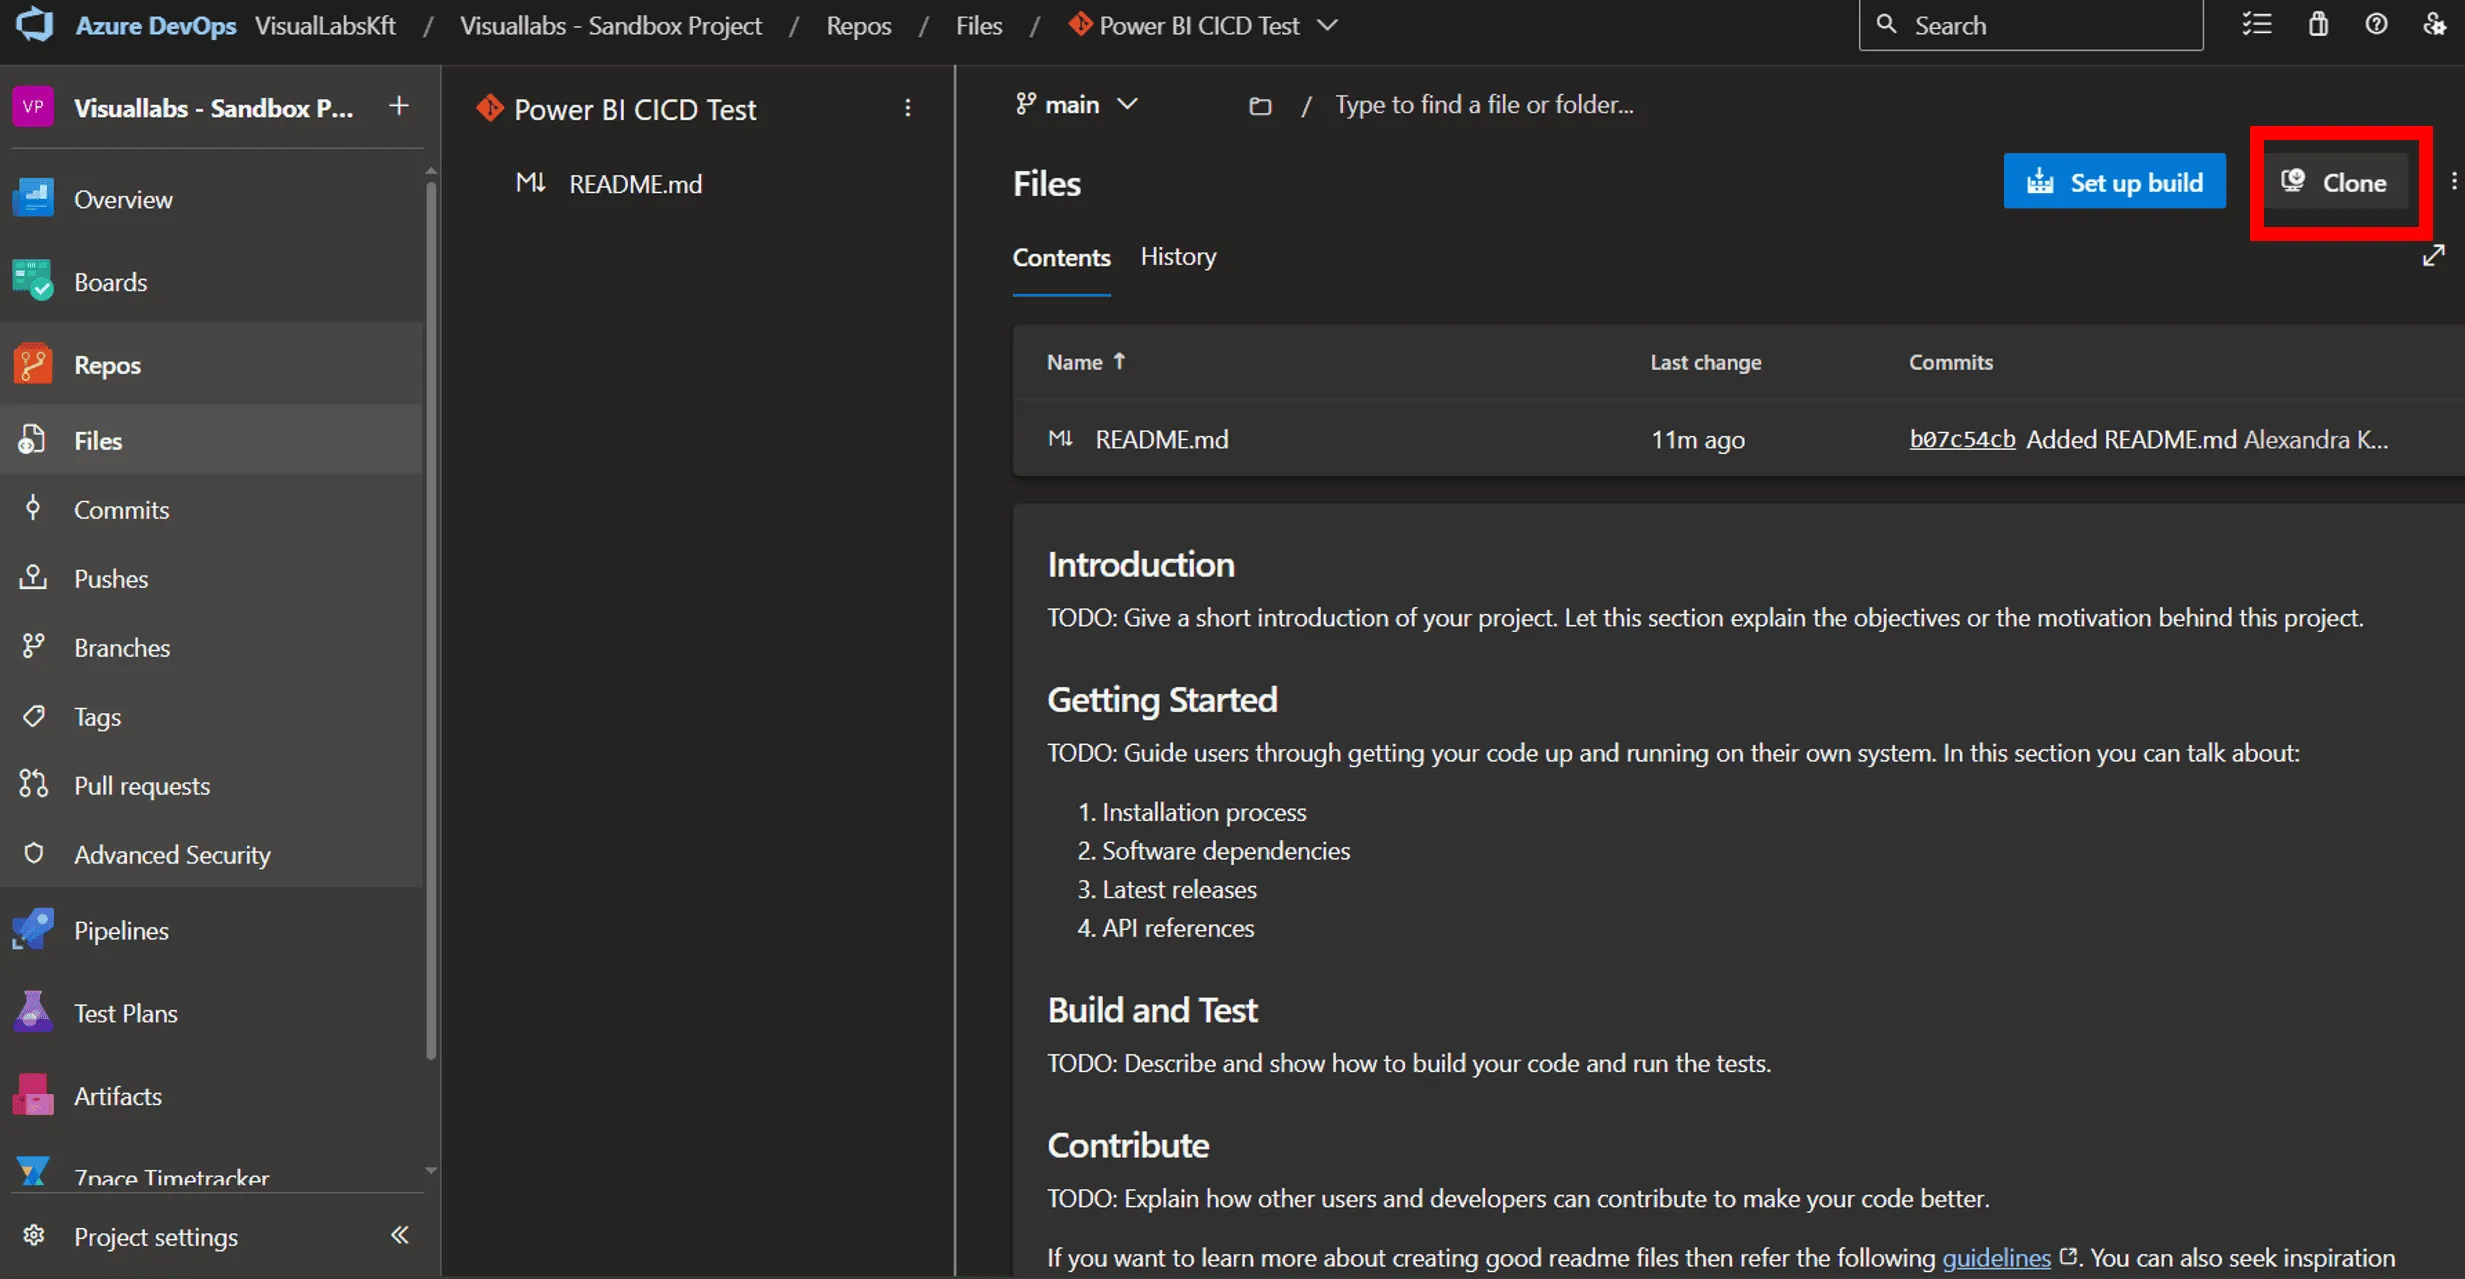
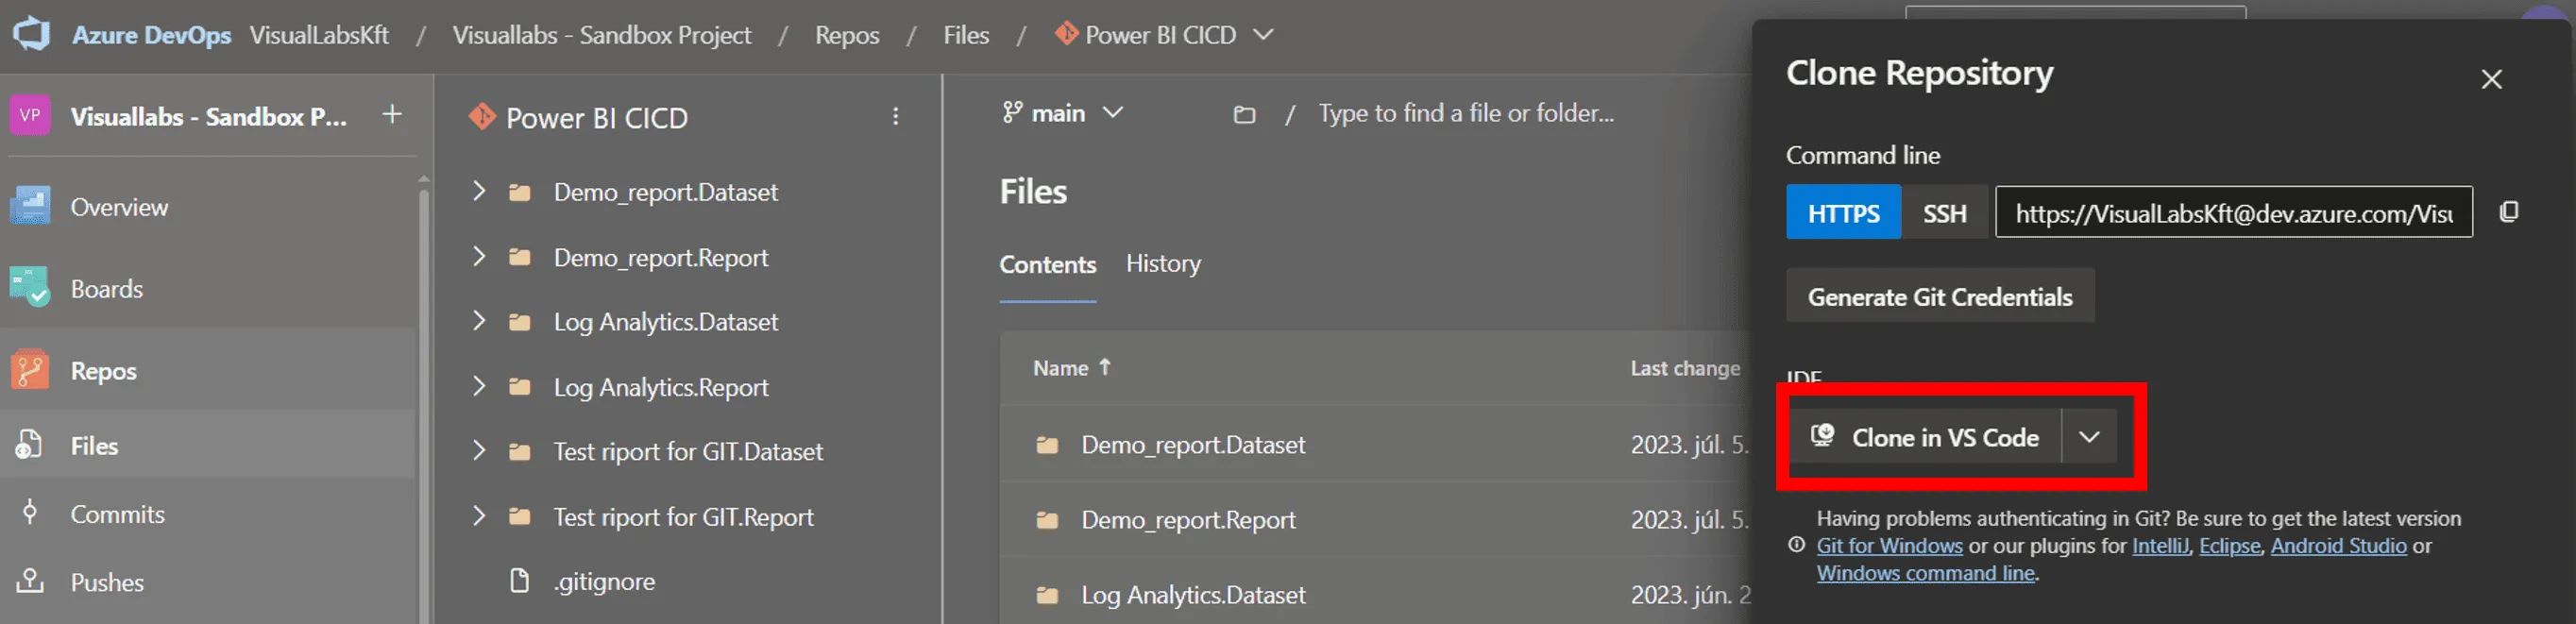
5. Select Clone in VS Code option
6. Select destination folder
My recommendation is to create a separate folder where you can store all your repos from this point. I’d also opt for a cloud location for this repo collector folder – like OneDrive.
7. In VS Code, you can check the current status of your repo
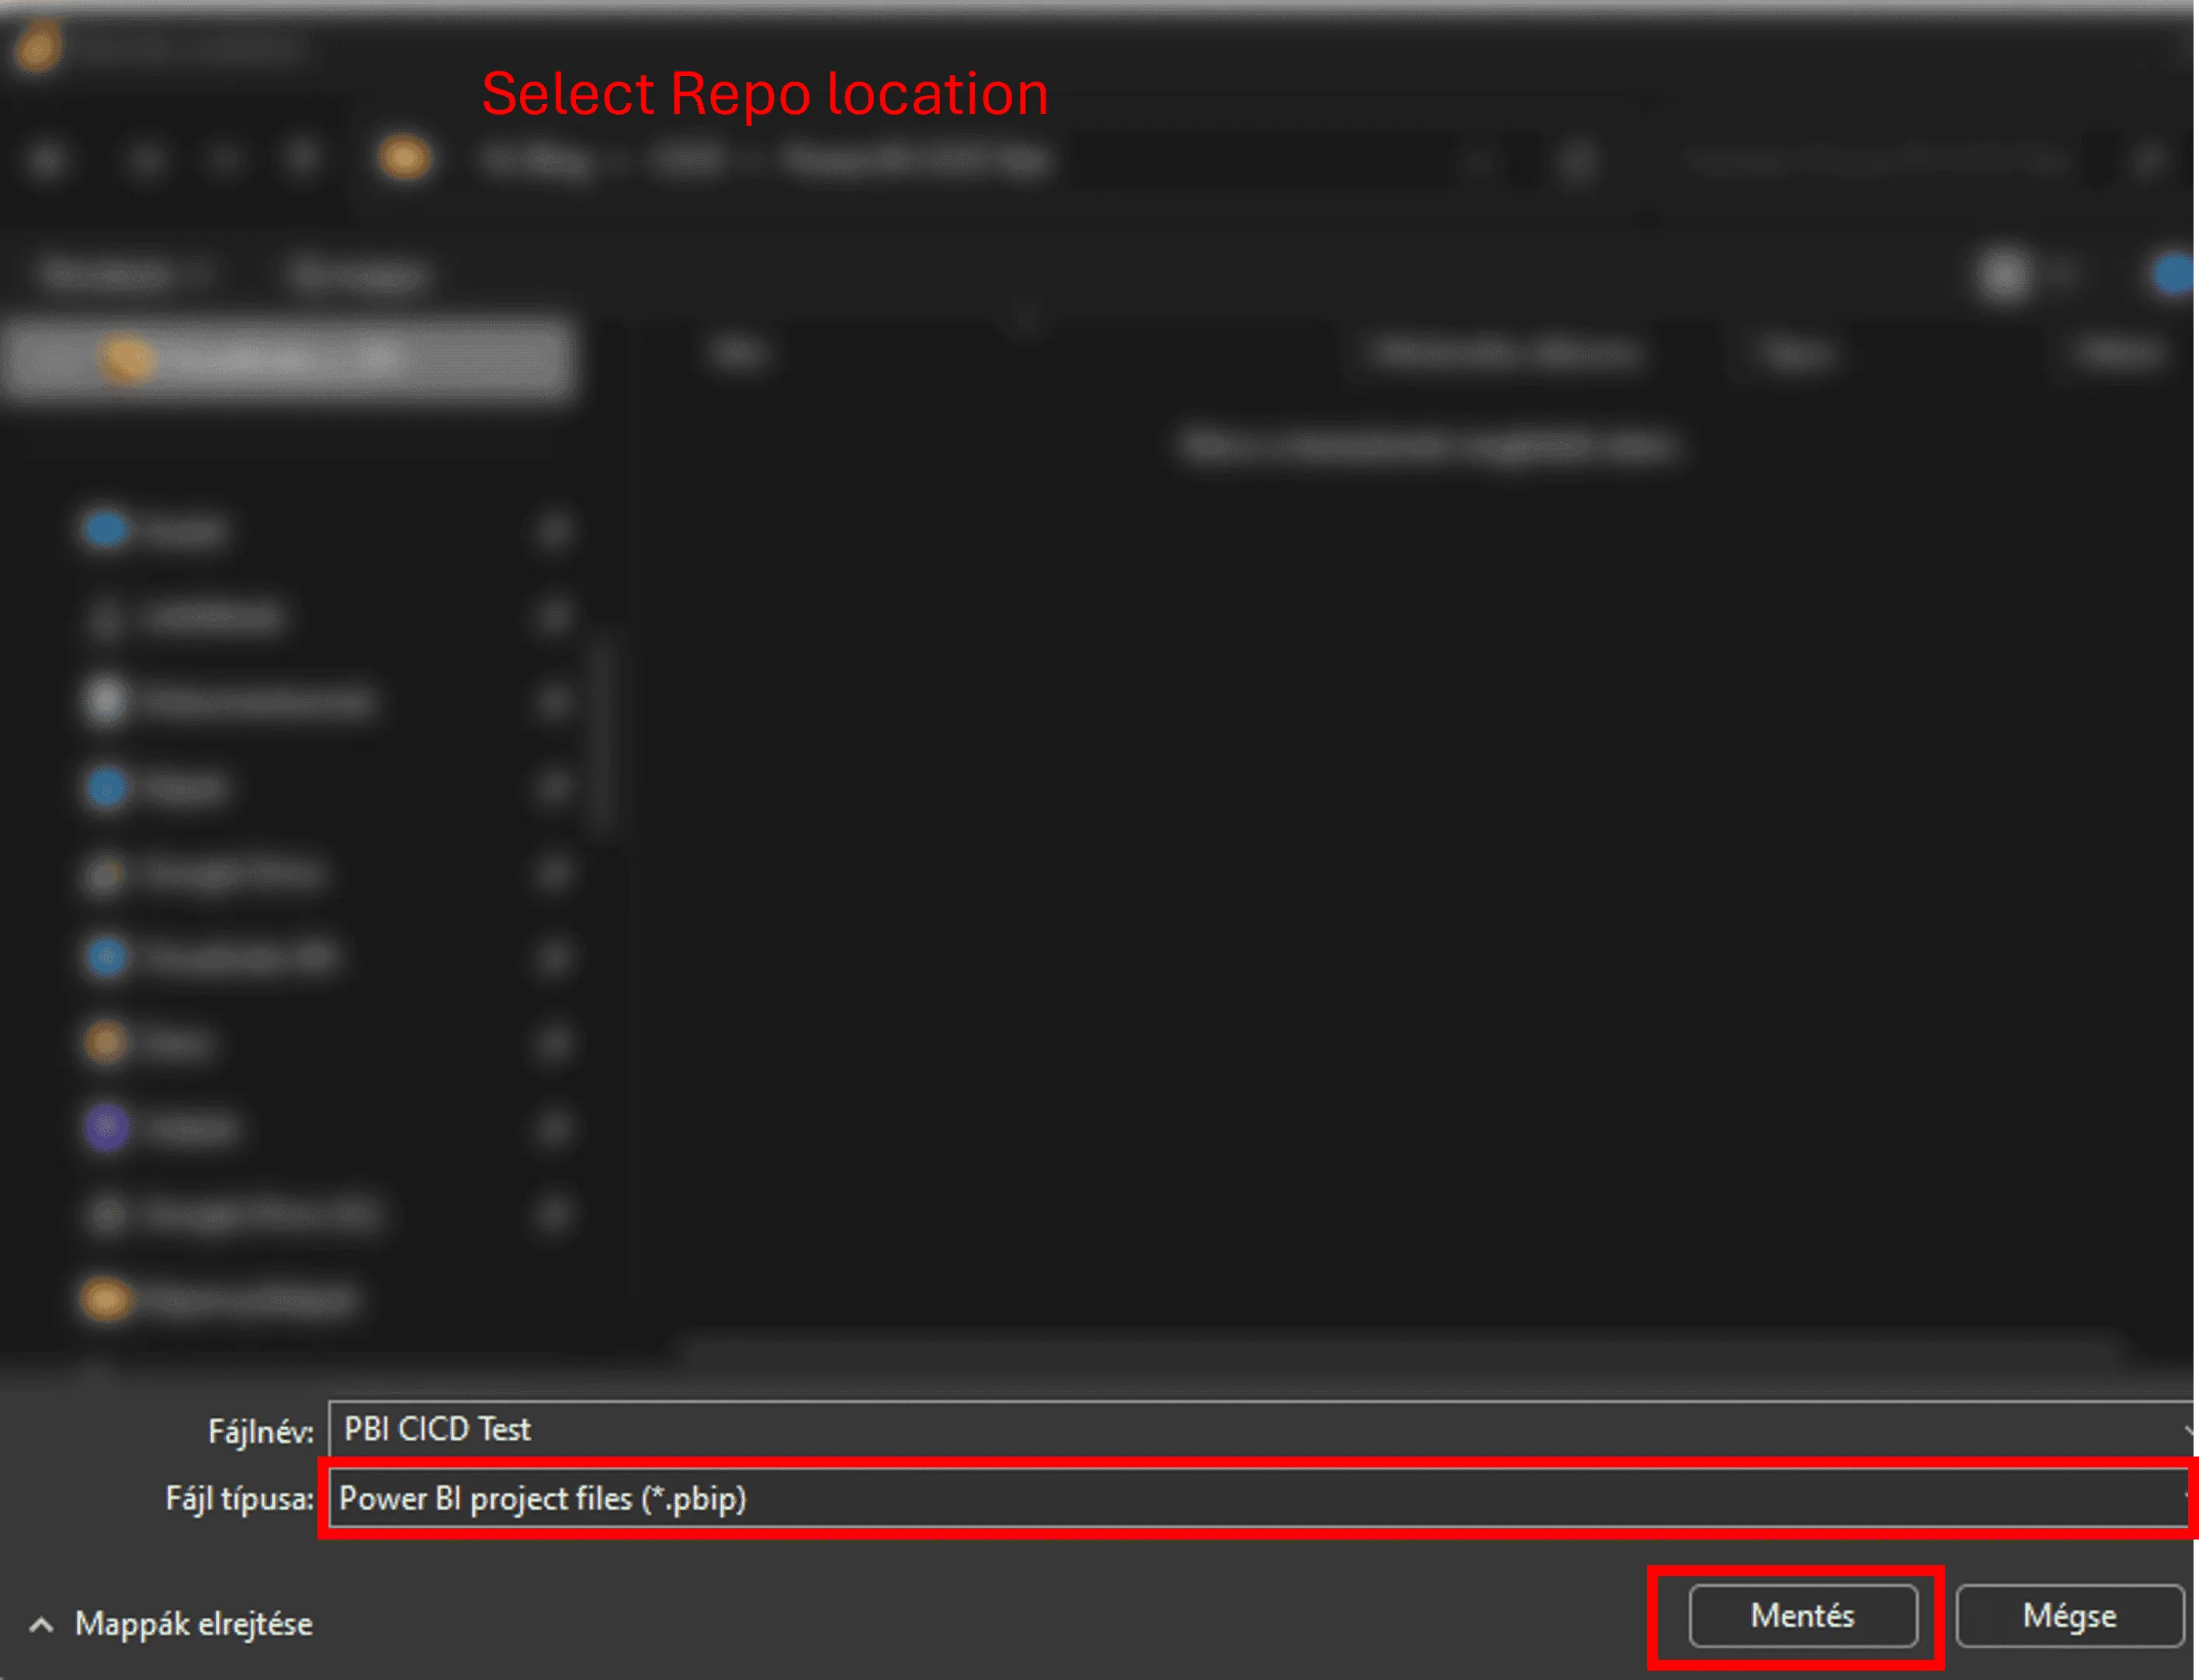
8. The last step is Save your Power BI file As.pbib to this folder.
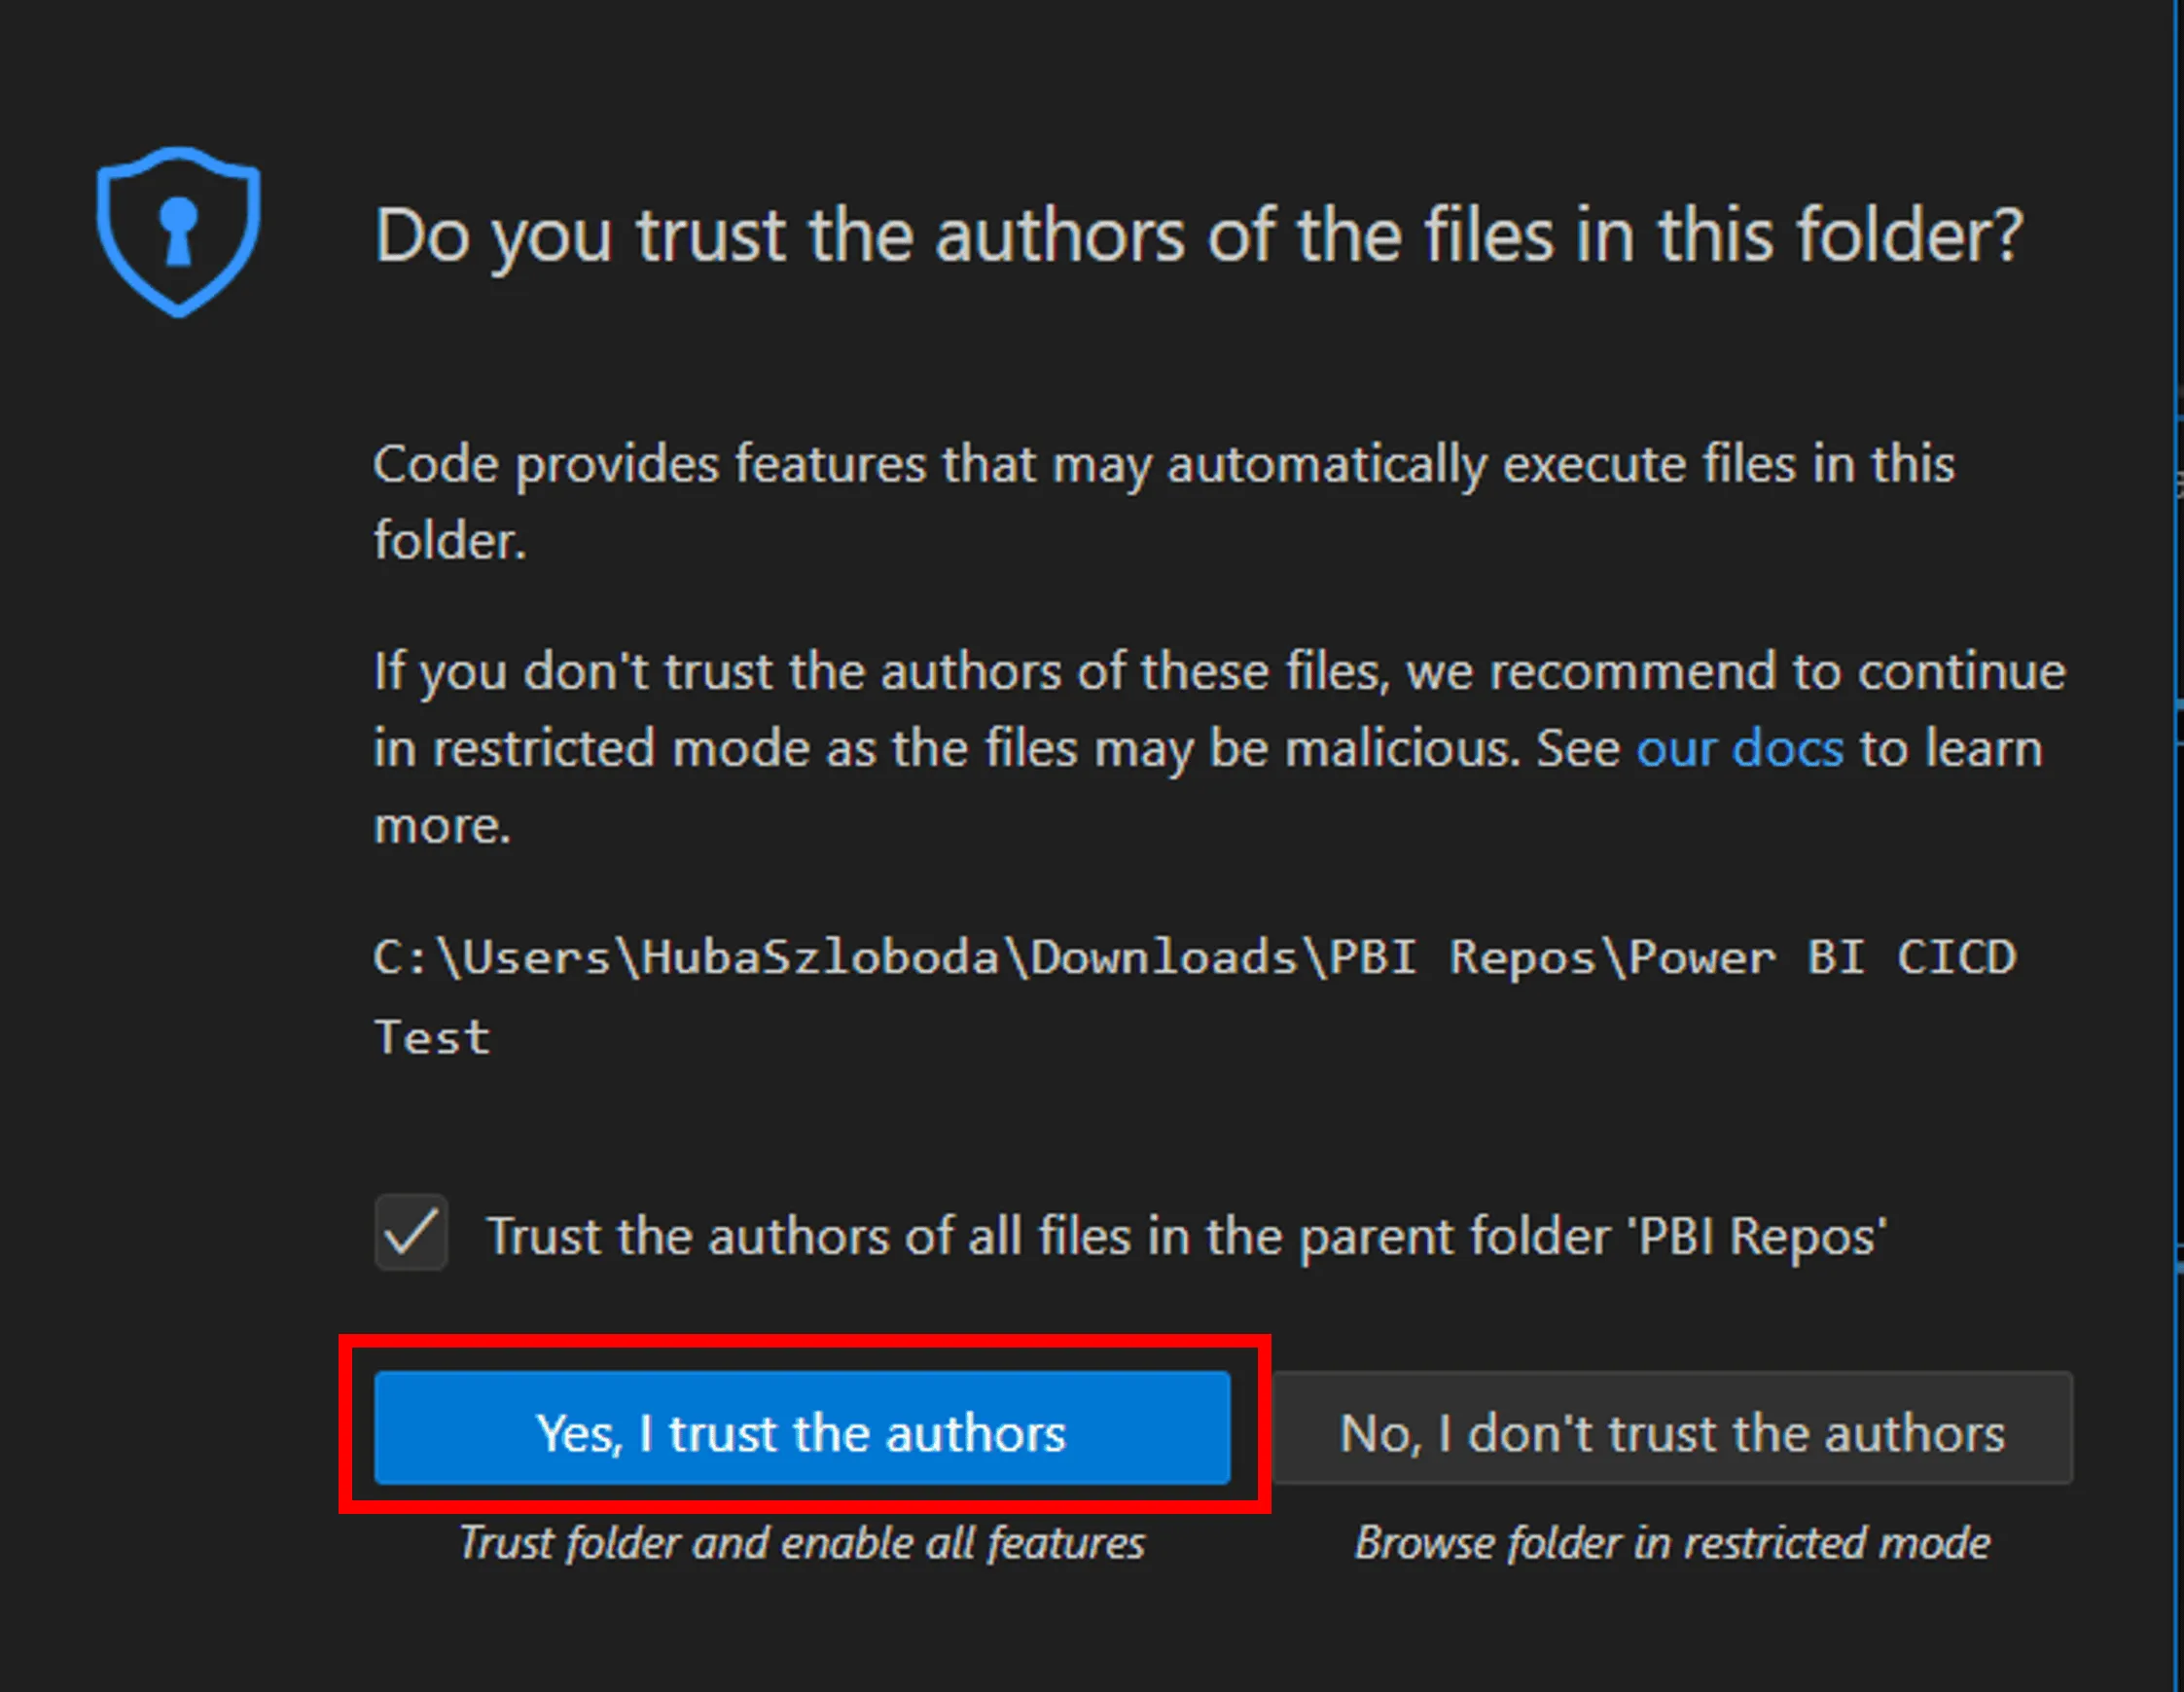
9. Click on Yes, I trust the authors to move tot he next step. You’ll see that VS Code recognized that there are new files in the folder.
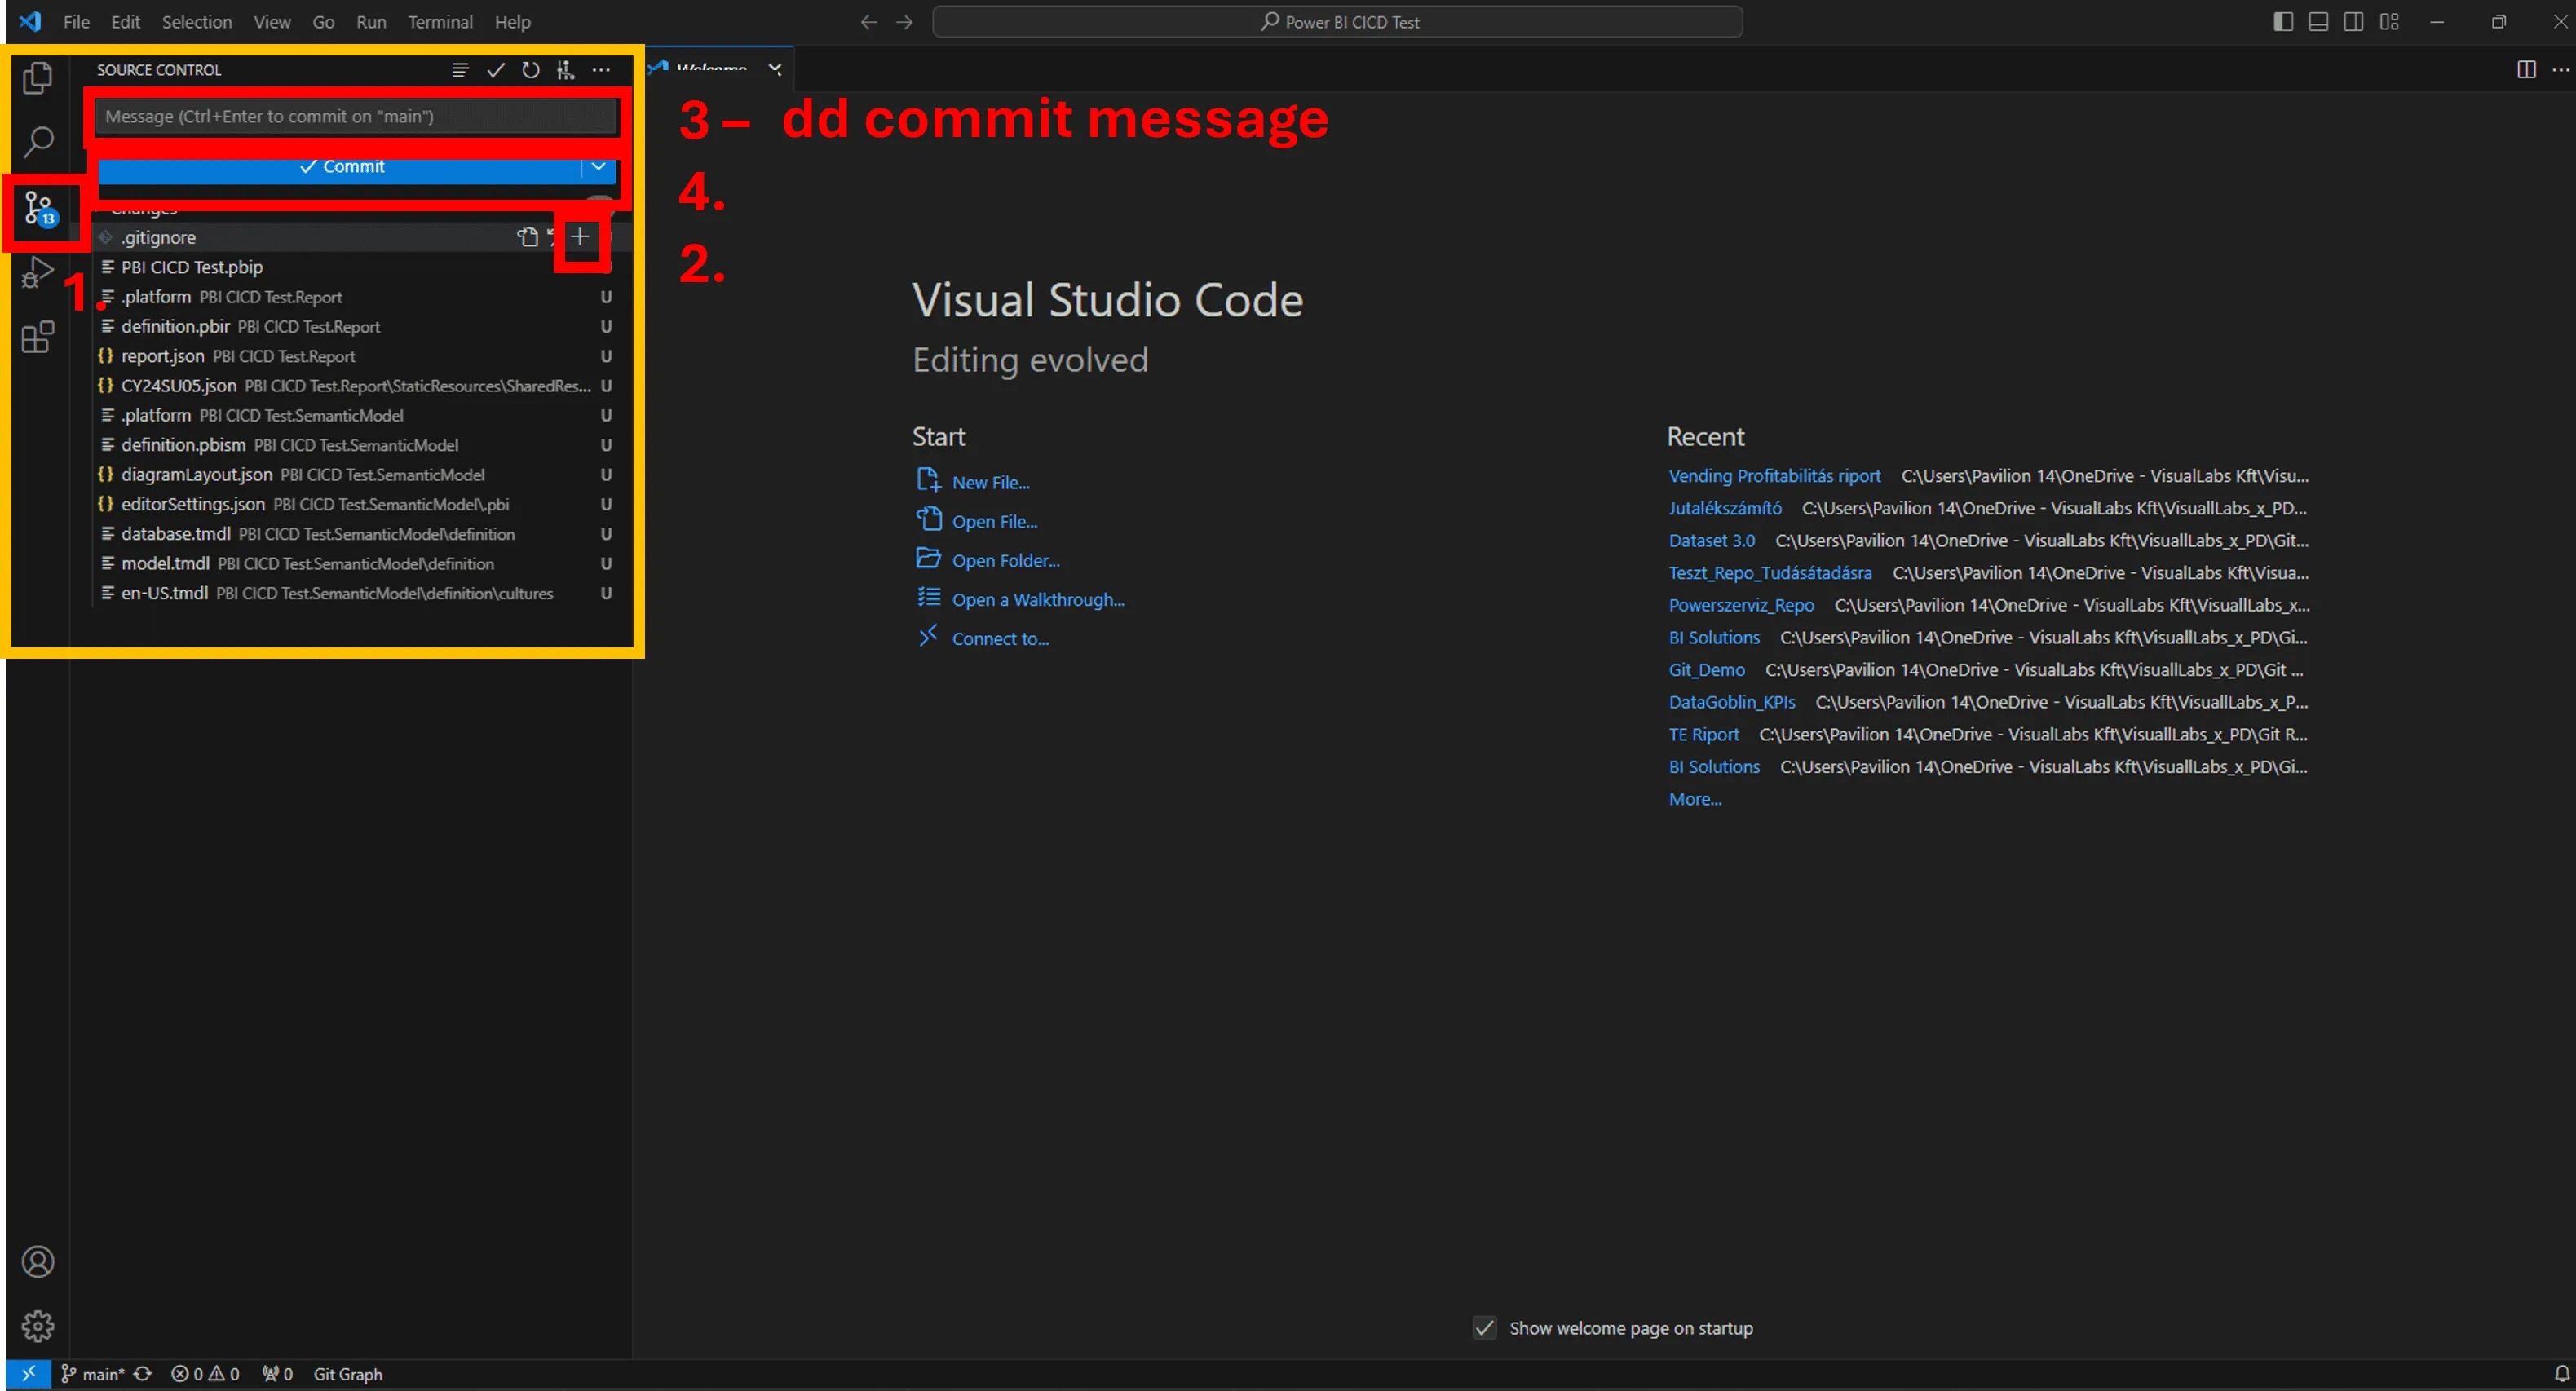
10. Now you can Add a coming message, Select the changes you want to keep (this the step called: stage changes, feel free to click on Select all) and Click Commint (it is only going to save it locally)
11. Click Sync changes (now it’s in the colud – you can check it in the Repo created on Azure DevOps)
12. GitGraph will look like this:

13. Congrats!
Your source control journey has officially begun! Feel free to create branches, repos etc., and start the co-development with your colleagues or just simply enjoy that you won’t ever be named to “MyProject_final_v124_final12.pbix”
Blog posts
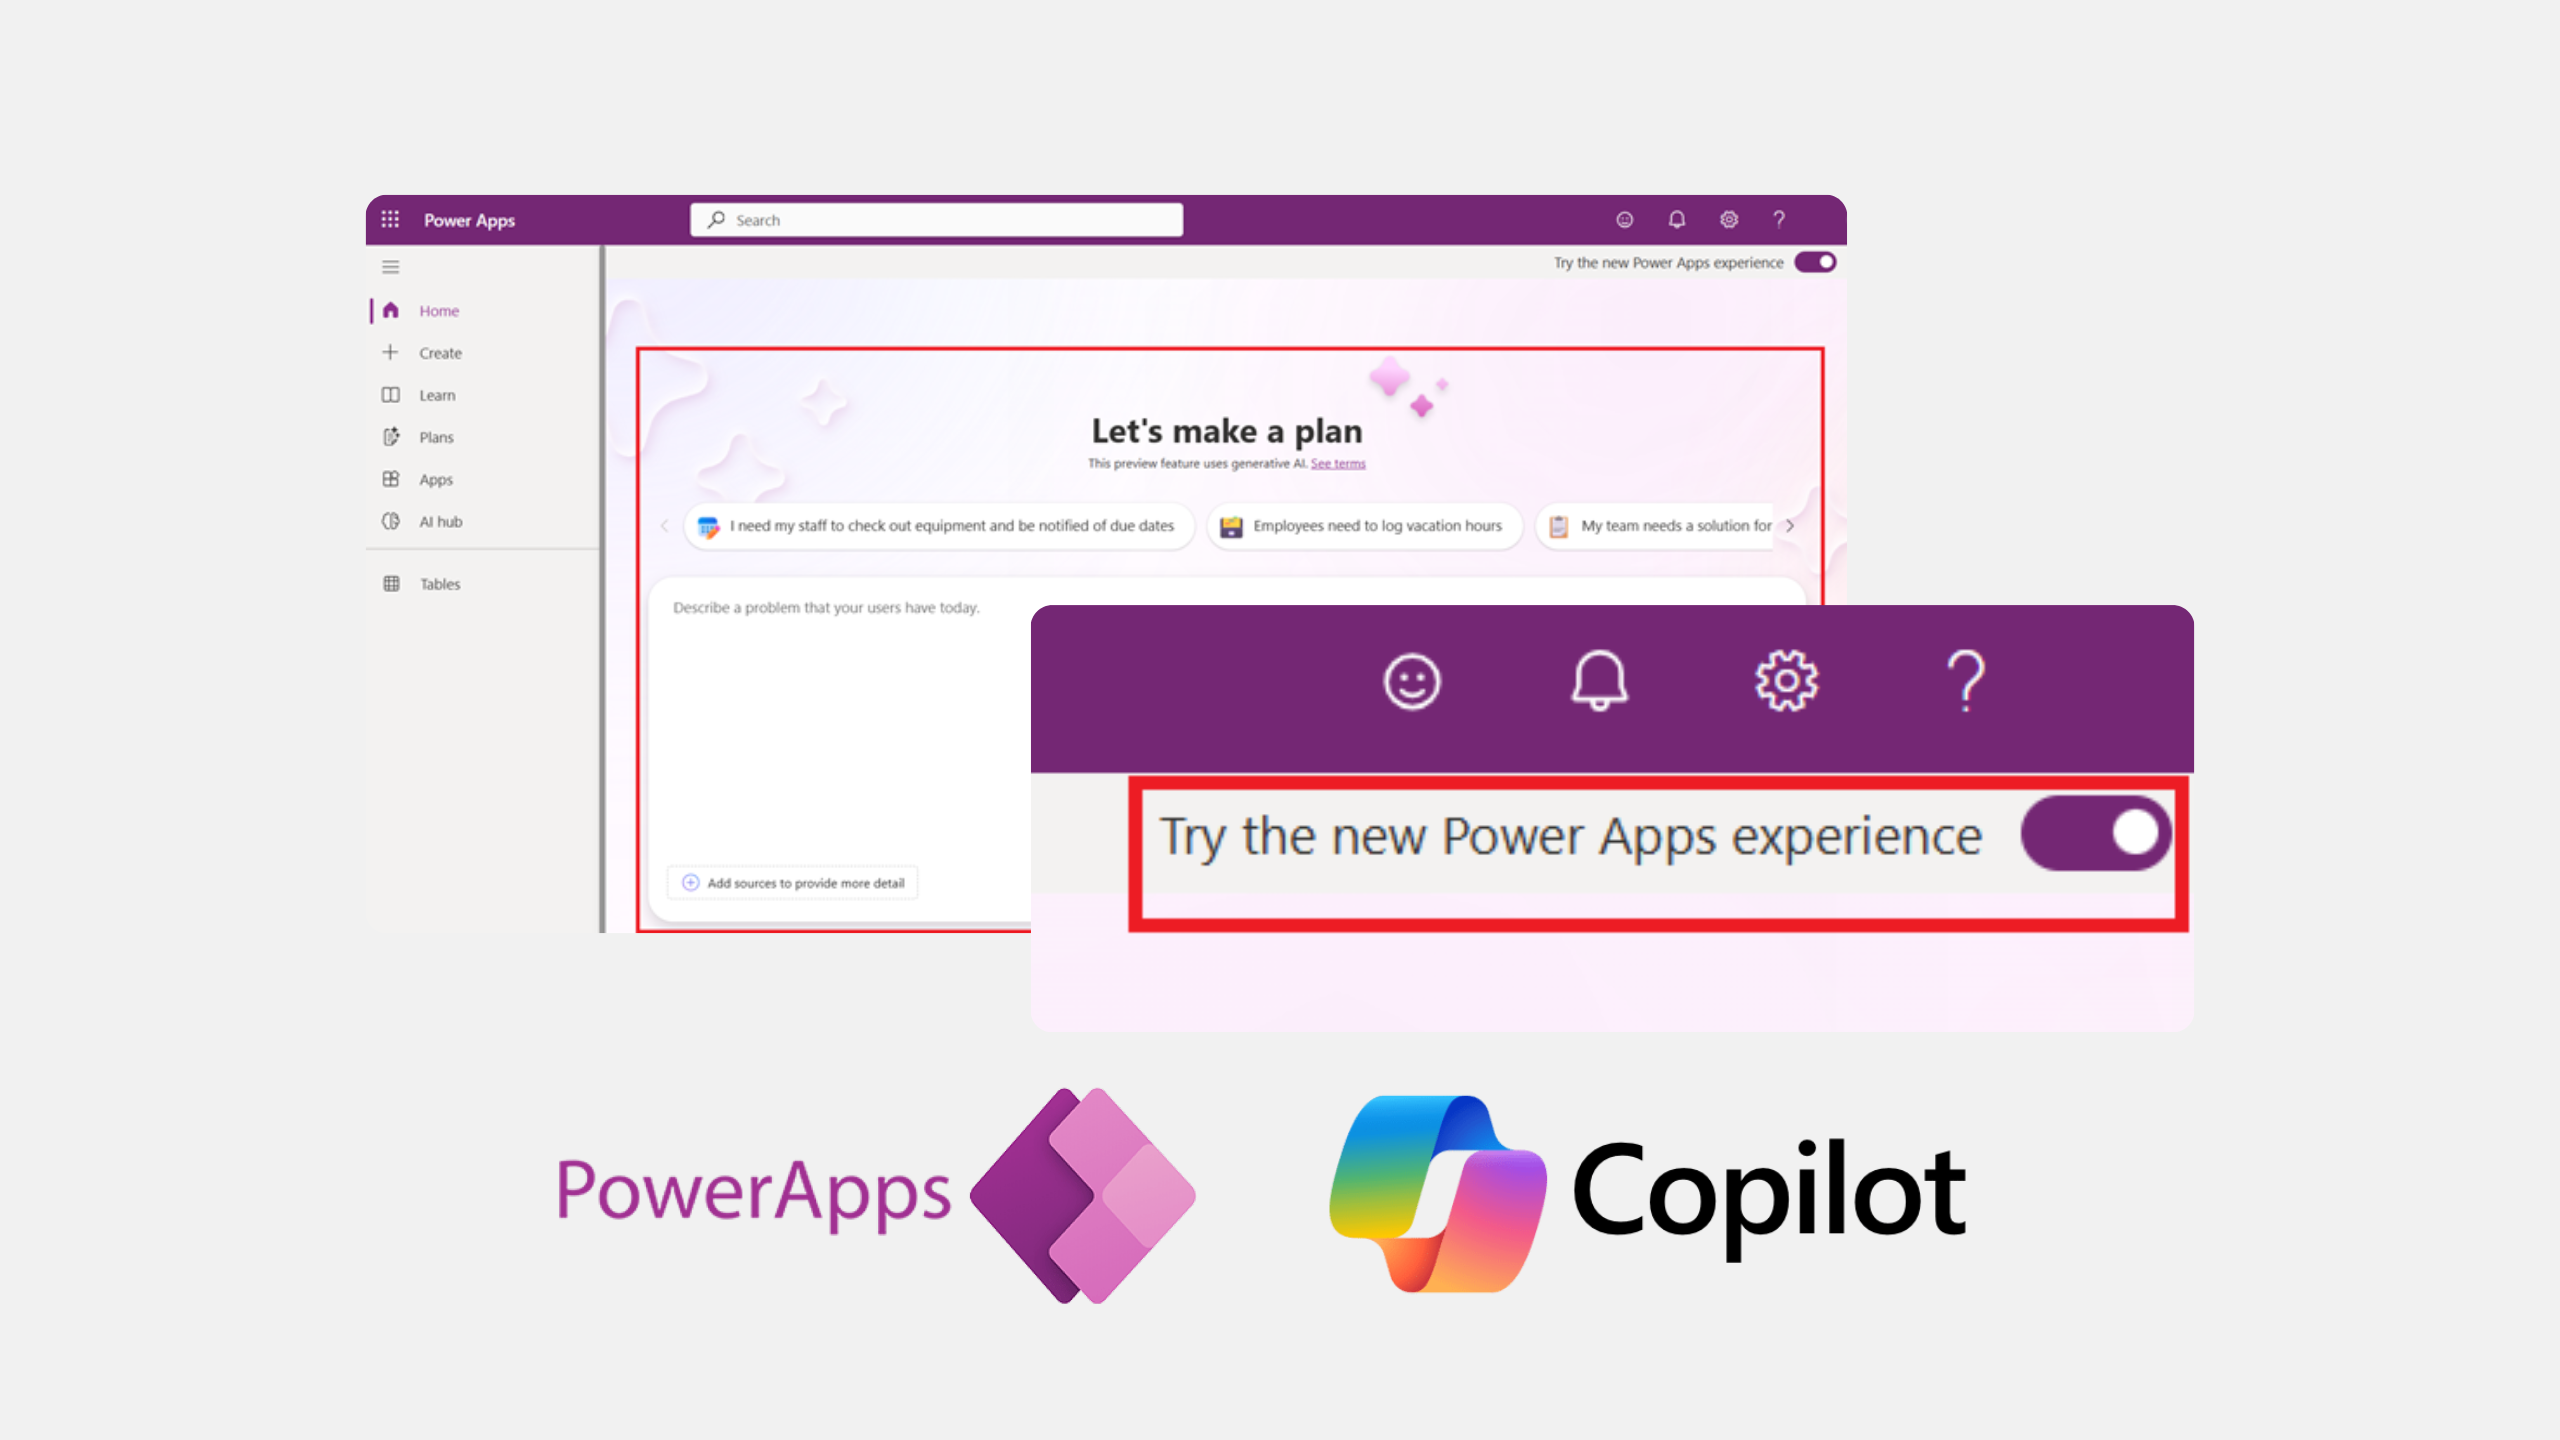
There's a new way to turn business ideas into app frameworks
Heading 1
Heading 2
Heading 3
Heading 4
Heading 5
Heading 6
Lorem ipsum dolor sit amet, consectetur adipiscing elit, sed do eiusmod tempor incididunt ut labore et dolore magna aliqua. Ut enim ad minim veniam, quis nostrud exercitation ullamco laboris nisi ut aliquip ex ea commodo consequat. Duis aute irure dolor in reprehenderit in voluptate velit esse cillum dolore eu fugiat nulla pariatur.
Block quote
Ordered list
- Item 1
- Item 2
- Item 3
Unordered list
- Item A
- Item B
- Item C
Bold text
Emphasis
Superscript
Subscript
How to Set Your Local Currency as the Default in Dynamics 365
Heading 1
Heading 2
Heading 3
Heading 4
Heading 5
Heading 6
Lorem ipsum dolor sit amet, consectetur adipiscing elit, sed do eiusmod tempor incididunt ut labore et dolore magna aliqua. Ut enim ad minim veniam, quis nostrud exercitation ullamco laboris nisi ut aliquip ex ea commodo consequat. Duis aute irure dolor in reprehenderit in voluptate velit esse cillum dolore eu fugiat nulla pariatur.
Block quote
Ordered list
- Item 1
- Item 2
- Item 3
Unordered list
- Item A
- Item B
- Item C
Bold text
Emphasis
Superscript
Subscript
Ready to talk about your use cases?
Request your free audit by filling out this form. Our team will get back to you to discuss how we can support you.
